How to Paint Kitchen Cabinets: A Dallas DIY Guide (Sanding, Primer & Where DIY Fails)
Published September 3, 2026
How to paint kitchen cabinets the right way: degrease, sand to 220 grit, the primer that actually bonds, and the honest spots where DIY cabinet jobs fail in North Texas heat.
Here is the guide that will honestly walk you through painting your own kitchen cabinets, and also tell you exactly where DIY cabinet jobs fall apart. Most how-to articles online stop at "sand, prime, paint" and wave you toward the paint aisle. That advice is not wrong, it is just incomplete, and the missing pieces are the ones that decide whether your cabinets look like new furniture or like painted-over wood in six months. We have been spraying cabinets across Dallas since 1992, and the pattern is consistent: the steps a determined homeowner can do well are the prep steps, and the steps that quietly fail are the finish and the environment. This guide covers the full DIY process, degrease, sand, prime, coat, and it is straight with you about the two or three places where a professional spray booth is the difference between a finish that lasts a decade and one that chips at the first slammed door.
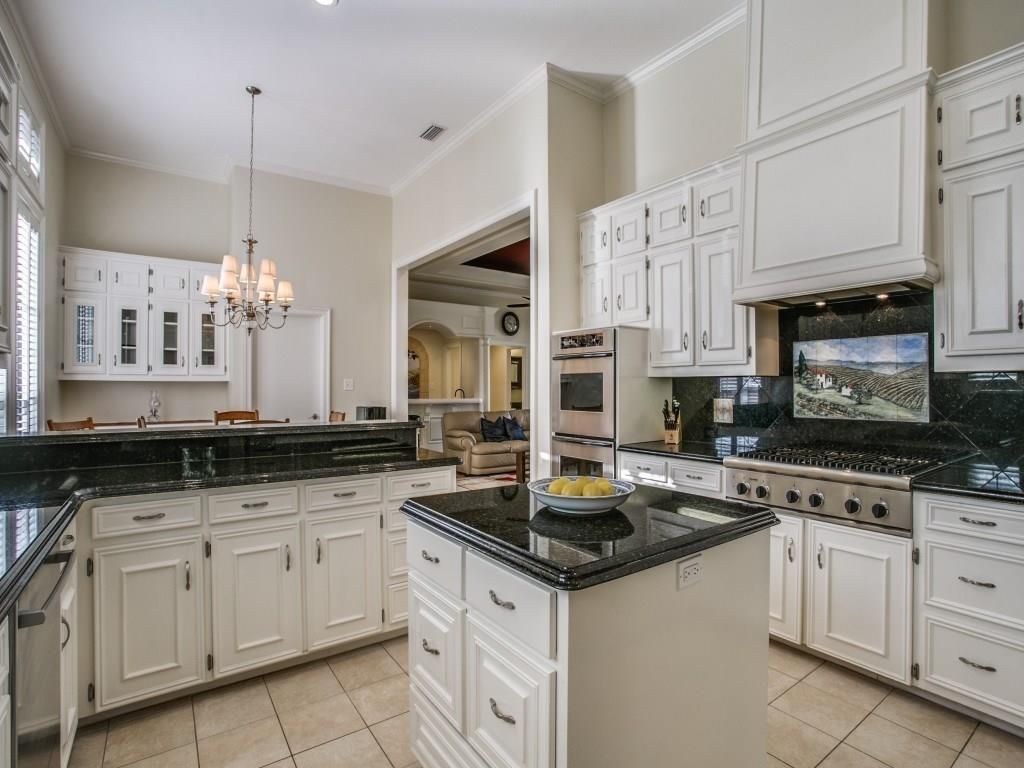
!Dallas kitchen cabinets prepped and repainted with a smooth sprayed finish
How to paint kitchen cabinets, step by step
Painting kitchen cabinets is a multi-day job with a fixed order, and every step exists because skipping it is how the finish fails. Plan on three to five days for a full kitchen with proper dry times, not a weekend. The sequence a DIYer should follow is the same one we run, and it goes clean, remove, degrease, sand, prime, coat:
- Label and remove every door, drawer front, and piece of hardware. Number the back of each door with painter's tape so it goes back on the same hinge. Nothing gets painted in place if it can come off, because a sprayed or brushed door laid flat lays down far smoother than one hanging vertical.
- Degrease before you touch sandpaper. Kitchen cabinets carry years of cooking oil and hand grease, worst around the range and the sink. Clean with a TSP substitute first. Sanding greasy wood just drives the grease deeper and the primer will not bond over it.
- Sand to 220 grit. This dulls the factory sheen so the primer has a mechanical profile to grab. More on this below, because it is the step DIYers rush most.
- Prime with a bonding or shellac-based primer. On factory-sealed, previously stained cabinets, this is the single most important product decision. Standard wall primer will not lock down a slick, sealed surface.
- Apply the finish coats in thin, even layers. Two to three thin coats beat one thick one every time. Thick coats sag, trap solvent, and stay soft for weeks.
- Sand lightly between coats and cure fully before reinstalling. A quick scuff with fine paper between coats is what produces a flat, factory-smooth surface. Then let the finish harden before you rehang doors and load dishes.
The steps a homeowner can genuinely nail are the prep steps. The steps that quietly ruin the job are the finish coats and the environment they cure in. That split is the whole story of DIY cabinets.
If you want a professional to handle the parts that are hardest to get right, that is exactly what our professional kitchen cabinet painting in Dallas is built around. Get a free written estimate and we will look at your boxes, your finish, and your goals before quoting a thing.
Sanding cabinets before painting: the step nobody skips and gets away with
Sanding is the step that decides whether your paint sticks, so do not shortcut it. Sand every surface you plan to coat to 220 grit until the factory sheen is uniformly dull, then wipe every trace of dust off with a tack cloth before priming. Glass-smooth factory finishes are the number one reason DIY cabinet paint peels: there is nothing for the coating to grab, so it sits on top like a sticker and lifts at the first knock.
Here is what a proper cabinet sanding pass actually involves:
- Sand the whole visible surface, not just the rough spots. The goal is not to remove the old finish, it is to scuff it uniformly so primer bonds everywhere.
- 220 grit is the sweet spot. Coarser than that leaves scratches that telegraph through the finish. Finer than that barely dulls the sheen.
- Get into the profiles and corners by hand. Detail sanders skip over raised-panel edges and inside corners, which is exactly where peeling starts.
- Remove every speck of dust. Vacuum, then tack cloth. Primer over dust is primer that is not actually touching the wood.
Owner's note: after 40-plus years on Dallas kitchens, almost every peeling DIY cabinet we get called to redo traces back to one of two shortcuts. Someone painted over grease, or someone skipped the sanding and primed a slick factory finish. Both fail the same way: the coating lifts in sheets the first time a door gets bumped by a hip carrying groceries.
Getting the surface right is genuinely doable on your own with patience and a respirator. If you would rather not spend two days sanding cabinet doors in your garage, Call (214) 352-9031 and we will tell you straight what your kitchen involves.
Kitchen cabinet painting primer: why this is the decision that makes or breaks the job
Primer is where a cabinet job is won or lost, so this is not the place to save money. On factory-sealed and previously stained cabinets, use a shellac-based primer such as Zinsser BullsEye or a dedicated bonding primer, because those are formulated to grip a slick, sealed surface that ordinary wall primer slides right off. The primer is what locks the whole system to the wood. Everything above it is only as good as that bond.
!Interior finish work in a Dallas home showing smooth, evenly coated surfaces
A few things worth knowing before you buy primer:
- Shellac-based primers bond aggressively and block stains and tannin bleed. On older oak and on any wood that might bleed through, they seal the surface so the color stays true. They dry fast and sand well.
- Bonding primers are the other solid choice when you want a water-based cleanup and slightly lower odor, as long as the label specifically says it bonds to glossy, hard-to-coat surfaces.
- Skip general-purpose wall primer entirely. It is built for drywall, not for slick sealed cabinetry, and it will not hold the finish under daily kitchen use.
- Sand the primer lightly once it is dry. A quick scuff before the first finish coat gives you the smoothest possible base.
The honest version: the primer is the most important product in the whole project, and it is the one DIYers are most tempted to grab off the same shelf as their wall paint. Match the primer to a sealed cabinet surface and the rest of the job has a fighting chance.
When DIY cabinet painting is the wrong call
Here is the part most guides will not tell you, because it might talk you out of the project, which is exactly why it belongs here. Doing your own cabinets is a reasonable weekend-warrior job when the boxes are sound and you accept a hand-applied finish. But be honest about where DIY hits a wall. Skip the DIY route, or hand it to a pro, if any of these are true: you want a genuinely factory-smooth, spray-applied finish with no brush or roller texture; your kitchen is your only kitchen and you cannot lose it for the better part of a week; or you are painting high-gloss, thermofoil, or laminate cabinets, which need specialized adhesion prep that punishes mistakes. Spray-applied catalyzed lacquer and a controlled, dust-free curing environment are where DIY cabinet jobs most often fail, because a garage in a humid Dallas summer is fighting the coating chemistry the whole time. There is no shame in prepping it yourself and hiring out the finish, or in handing the whole thing over. We would rather tell you that up front than watch a good weekend of work chip in a season.
Spray versus brush, and why our finish coats go to a booth
Brushing and rolling can produce a decent cabinet finish, but they cannot produce a factory-smooth one, and cabinets are the one surface in the house where people notice brush strokes and roller stipple instantly. This is the honest dividing line between a good DIY result and a professional one. If you brush, use a self-leveling waterborne alkyd such as Benjamin Moore Advance, work in thin coats, and lay off in one direction to minimize strokes. It will look good from a step back. Up close, in kitchen light, it will read as a hand-painted finish, which is fine if that is what you want.
Cabinets are where shortcuts show fastest. A sprayed, self-leveling coating applied in a controlled environment is what separates a finish that looks like new cabinetry from one that looks like painted-over wood.
For a true factory-smooth result, the finish coats have to be sprayed, and sprayed somewhere dust-free with controlled temperature and humidity. That is why our doors and drawers go to a controlled spray environment rather than getting coated in a driveway, and why we spray catalyzed lacquer or a cabinet-rated waterborne alkyd such as Sherwin-Williams Emerald Urethane Trim Enamel or ML Campbell Magnacure, all rated for cabinet-grade hardness so doors do not stick to frames. If you are weighing whether the whole project is even the right move for your kitchen, our guide to whether to repaint vs. replace your kitchen cabinets walks through judging the boxes first. And when you want the sprayed, guaranteed finish, Tell us what you're picturing and we will map the color, the prep, and the schedule before anyone shows up with equipment.
North Texas humidity and why cabinet finishes cure badly in a garage
Cure is where the Dallas climate quietly wrecks DIY cabinet jobs. Waterborne alkyds and catalyzed lacquers both cure best in a controlled band of temperature and humidity, and North Texas summers swing hard on both, especially in an un-conditioned garage. High humidity slows the cure and can cloud or soften the finish, and a coating that feels dry to the touch in an hour can still be weeks away from full hardness. Reinstall the doors and stack dishes against a finish that has not cured, and you get sticking, printing, and chips.
North Texas fact: a garage-based cabinet spray job on a humid July Dallas afternoon is fighting physics the whole time. That single factor, the curing environment, is a big part of why controlled-environment finishing outlasts a driveway job, and why we stage our finish coats around cure conditions rather than the calendar.
If you take on your own cabinets, time the work for milder, drier weather, keep the space as climate-controlled as you can, and give every coat far longer to cure than the can suggests before reassembly. When the boxes are good, a professional repaint is one of the highest-impact, most affordable updates you can make to a Dallas kitchen, and ours is backed by a 3-year guarantee on the work. Ready when you are: Call (214) 352-9031 and we will tell you honestly whether to tackle it yourself or let us handle the finish.
Frequently Asked Questions
Should you spray or brush kitchen cabinets?
Spraying produces a factory-smooth, texture-free finish, while brushing leaves visible strokes that stand out on cabinets more than on any other surface in the house. For a true furniture-grade look, the finish coats should be sprayed, ideally in a controlled, dust-free environment with stable temperature and humidity, which is exactly why our doors and drawers go to a controlled spray booth rather than getting coated in a driveway. If you are painting your own cabinets and do not have spray equipment, use a self-leveling waterborne alkyd such as Benjamin Moore Advance, apply thin coats, and lay off in one direction to minimize strokes. It will look good from a step back but will read as hand-painted up close in kitchen light. The other advantage of spraying is control over film build: thin, even sprayed coats cure harder and more uniformly than brushed ones, which matters for cabinets that take daily abuse.
What primer should I use on kitchen cabinets?
Use a shellac-based primer such as Zinsser BullsEye or a dedicated bonding primer, not general-purpose wall primer. Kitchen cabinets are usually factory-sealed or previously stained, which leaves a slick, hard surface that ordinary wall primer slides right off. A shellac-based or bonding primer is formulated to grip that surface and lock the whole coating system to the wood, and shellac-based primers also block stains and tannin bleed on older oak so the finish color stays true. The primer is the single most important product decision in a cabinet job, because everything above it is only as good as that bond. Prime after you have degreased and sanded to 220 grit, then scuff the dried primer lightly before your first finish coat for the smoothest possible base.
How do you sand cabinets before painting?
Sand every surface you plan to coat to 220 grit until the factory sheen is uniformly dull, then remove all dust with a vacuum and a tack cloth before priming. The goal is not to strip the old finish, it is to scuff it evenly so the primer bonds everywhere, so sand the whole visible surface and not just the rough spots. Get into raised-panel edges, profiles, and inside corners by hand, since power sanders skip those exact spots and that is where peeling starts. Glass-smooth factory finishes that are not sanded are the number one reason DIY cabinet paint peels, because the coating has nothing to grab and lifts at the first knock. Skipping dust removal is just as damaging: primer over dust is primer that is not actually touching the wood.
Can you paint kitchen cabinets yourself, or should you hire a pro?
You can absolutely do the prep yourself, degreasing, sanding to 220 grit, and priming are all reasonable weekend-warrior work if the boxes are sound and you are patient. Where DIY cabinet jobs most often fail is the finish and the curing environment: spray-applied catalyzed lacquer and a controlled, dust-free space are what produce a factory-smooth surface that lasts, and a humid Dallas garage fights that chemistry the whole time. Hire out the finish, or the whole job, if you want a truly smooth sprayed look, if you cannot lose your only kitchen for the better part of a week, or if you are dealing with high-gloss, thermofoil, or laminate cabinets that need specialized adhesion prep. Many homeowners prep their own cabinets and hire a professional for the sprayed finish, which is a perfectly legitimate split. We back our cabinet work with a 3-year guarantee.